
This article examines the ideal wattage for soldering battery terminals, highlighting the essential tools, techniques, and safety measures required for effective and secure soldering.
Understanding Soldering Basics
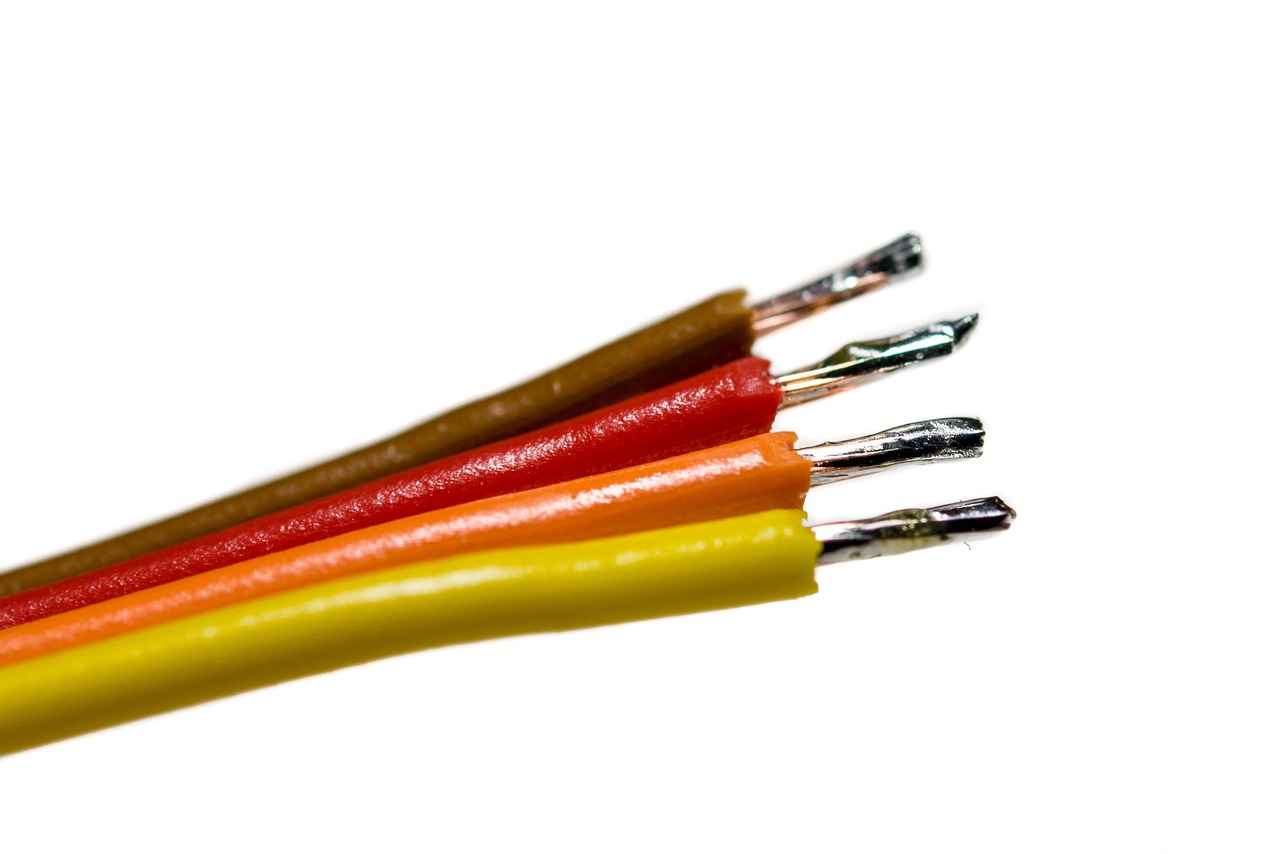
Before we delve into wattage specifics, it is crucial to grasp the fundamentals of soldering. Soldering involves joining two or more electronic components using a filler metal (solder) that melts when heated. The primary tools required include a soldering iron, solder, and a soldering iron stand. Battery terminal connections typically use rosin-core solder, which contains flux to enhance adhesion and prevent oxidation.
Why Wattage Matters in Soldering
The wattage of a soldering iron is a significant factor that influences its performance. Wattage determines the heat output, impacting how quickly and effectively the solder melts. A soldering iron with insufficient wattage may struggle to reach the necessary temperatures, leading to poor solder joints.
Impact of Low Wattage
Using a soldering iron with low wattage can result in inadequate heat transfer, leading to cold solder joints. These joints are characterized by a dull appearance and lack of structural integrity, which can compromise the performance of the battery terminals over time.
Signs of Poor Soldering
Recognizing cold solder joints is vital. Look for signs such as cracks or a dull finish, indicating that the solder did not flow correctly and the connection is weak.
Solutions for Low Wattage Issues
If you encounter problems with low wattage, consider upgrading to a higher wattage soldering iron. Alternatively, preheating the components can help improve solder flow and enhance joint quality.
Benefits of Higher Wattage
A soldering iron rated between 50 to 60 watts is ideal for battery terminal soldering. Higher wattage soldering irons heat up quickly and maintain consistent temperatures, making them perfect for creating reliable connections.
Recommended Wattage for Battery Terminal Soldering
For optimal results, a soldering iron rated between 30 to 60 watts is generally recommended. This range provides the necessary heat for effective soldering while allowing for precision control.
- 30 to 40 Watts: Suitable for small battery terminals and light-duty tasks, providing precision without excessive heat.
- 50 to 60 Watts: Ideal for larger terminals or demanding applications, ensuring quick and efficient soldering.
Choosing the Right Soldering Iron Type
Different soldering iron types are available, each tailored for specific tasks. Understanding these types will help you select the best tool for soldering battery terminals.
- Standard Soldering Irons: Versatile and widely used for various soldering tasks, including battery terminals.
- Temperature-Controlled Soldering Stations: Offer precise heat management, ideal for sensitive components.
Essential Soldering Techniques
Employing the right techniques is critical for successful soldering. Key methods include:
- Preparation of Components: Clean and tin surfaces for better solder adhesion.
- Applying the Solder: Heat both the terminal and wire simultaneously for a strong bond.
Safety Precautions When Soldering
Soldering can pose risks, including burns and exposure to fumes. Implementing safety measures is crucial:
- Protective Gear: Use safety glasses and heat-resistant gloves to prevent injuries.
- Ventilation and Fume Extraction: Ensure proper ventilation or use fume extraction systems to reduce exposure to harmful fumes.
In summary, selecting the appropriate wattage and employing the right techniques are essential for successfully soldering battery terminals. With the right tools and precautions, anyone can achieve strong, reliable connections.

Understanding Soldering Basics
Before embarking on the journey of soldering battery terminals, it is imperative to grasp the fundamentals of soldering. This includes familiarizing oneself with the essential tools and the types of solder that are most effective for battery terminal connections. Soldering is a process that involves joining two or more electronic components together using a filler material called solder, which is typically made of a combination of metals.
To begin, let’s explore the tools required for soldering. The primary tool is the soldering iron, which comes in various wattages. A higher wattage soldering iron heats up faster and maintains temperature better, making it ideal for tasks that require a strong, reliable connection. Other essential tools include:
- Solder: Common types include rosin-core solder, which is ideal for electronics due to its flux content, and lead-free solder for environmentally friendly applications.
- Soldering Iron Stand: This is crucial for safely holding the hot soldering iron when not in use.
- Soldering Flux: A chemical cleaning agent that helps improve the flow of solder and ensures better adhesion to the surfaces being joined.
- Wire Cutters: Necessary for trimming excess wire after soldering.
- Safety Equipment: Such as goggles and gloves to protect against burns and fumes.
Next, understanding the types of solder is equally important. The most commonly used solder in electronics is a tin-lead alloy, although there is a growing trend towards lead-free solder due to health and environmental concerns. Lead-free solder typically consists of a mixture of tin, copper, and silver, providing a reliable alternative without the health risks associated with lead.
When preparing to solder, it is essential to ensure that the surfaces to be joined are clean and free from oxidation. This can be achieved by using a wire brush or sandpaper to scrub the surfaces, followed by applying flux to enhance solder flow. Proper preparation not only improves the quality of the solder joint but also extends the lifespan of the connection.
In conclusion, mastering the basics of soldering is vital for anyone looking to work with battery terminals. By understanding the tools and types of solder available, as well as the importance of proper preparation, you can ensure strong and durable connections that will stand the test of time.

Why Wattage Matters in Soldering
Wattage plays a pivotal role in the effectiveness of soldering, especially when it comes to creating reliable electrical connections. Understanding wattage is essential for both novice and experienced solderers, as it directly impacts the performance of the soldering iron and the quality of the solder joints produced.
The wattage rating of a soldering iron indicates its power consumption and, consequently, its heat output. A higher wattage means that the soldering iron can reach and maintain higher temperatures more quickly, which is vital for melting solder effectively. This is particularly important when working with materials that require substantial heat to achieve a proper bond.
- Heat Transfer Efficiency: The ability of a soldering iron to transfer heat efficiently is crucial. Insufficient wattage can lead to inadequate heating of the solder and the components being joined. This can result in cold solder joints, which are weak and prone to failure.
- Types of Solder: Different types of solder require different temperatures to melt. For instance, lead-free solders often need higher temperatures compared to traditional lead-based solders. Therefore, selecting the appropriate wattage ensures that the soldering iron can handle the specific type of solder being used.
- Working with Various Components: When soldering battery terminals or other electronic components, the size and material of the components can affect the required wattage. Larger components typically require a soldering iron with higher wattage to ensure that heat is distributed adequately across the joint.
Inadequate wattage can lead to several issues. For example, if the soldering iron does not reach the necessary temperature, the solder may not flow properly, resulting in a poor connection. This can manifest as dull finishes or visible cracks, which are indicators of cold solder joints.
On the other hand, using a soldering iron with too high a wattage can also be problematic. Excessive heat can damage sensitive components or cause overheating, leading to burnt circuit boards or melted insulation. Therefore, achieving the right balance in wattage is crucial for successful soldering.
In summary, wattage is a fundamental aspect of soldering that influences heat output, solder flow, and the overall integrity of electrical connections. By understanding the importance of wattage and selecting the right soldering iron for the task at hand, solderers can ensure strong, reliable joints that will withstand the test of time.
Impact of Low Wattage
When it comes to soldering, particularly for applications like battery terminals, the wattage of your soldering iron plays a crucial role in the quality of your work. Using a soldering iron with low wattage can lead to significant issues, particularly insufficient heat during the soldering process. This can result in what are known as cold solder joints, which are not only visually unappealing but can also compromise the integrity of the connection over time.
Cold solder joints occur when the solder does not reach the appropriate melting temperature, preventing it from adequately bonding with the components. These joints may appear dull or grainy, and they often fail to create a solid electrical connection. As a result, devices powered by these poorly soldered connections can experience intermittent failures, reduced performance, and even complete operational breakdowns. In the context of battery terminals, this can lead to compromised battery performance, affecting the overall reliability of the device.
Moreover, low wattage soldering irons struggle to maintain consistent heat, especially when soldering larger components or terminals that require more thermal energy. This inconsistency can lead to uneven heating, which exacerbates the risk of cold solder joints. For instance, if you are soldering a larger battery terminal, a low wattage iron may not provide the necessary heat to ensure that both the wire and the terminal reach the appropriate temperature for soldering. In such cases, the solder may not flow properly, leading to weak connections that can fail under stress.
To effectively mitigate these issues, it is advisable to use a soldering iron with a wattage rating that matches the demands of your task. A soldering iron rated between 30 to 60 watts is generally recommended for battery terminal work, as it provides a balance of heat and control necessary for achieving strong, reliable solder joints.
In summary, the impact of low wattage in soldering cannot be overstated. Insufficient heat can lead to cold solder joints, which jeopardize the performance and reliability of battery terminals. By selecting the appropriate wattage and ensuring proper soldering techniques, one can avoid these pitfalls and achieve optimal soldering results.
Signs of Poor Soldering
Soldering is a critical skill in electronics, especially when working with components like battery terminals. Recognizing the signs of poor soldering is essential for ensuring reliable connections and preventing potential failures. This section will delve into the various indicators of inadequate soldering practices, focusing on cold solder joints and other common issues.
- Dull Finishes: One of the most noticeable signs of a cold solder joint is a dull or matte finish. Unlike a well-soldered joint, which has a shiny appearance, a dull finish indicates that the solder did not flow properly, often due to insufficient heat.
- Cracks: Visible cracks around the solder joint are a clear indication of a poor connection. These cracks can occur when the joint cools too quickly or if there was not enough heat applied during the soldering process, leading to a weak bond.
- Balling of Solder: If the solder appears to have formed small balls rather than smoothly covering the joint, this is a sign of inadequate heating. Proper soldering should result in a smooth, even distribution of solder.
- Weak Mechanical Connection: A joint that can be easily moved or pulled apart is a sign of a poor soldering job. A strong solder joint should hold the components securely together, providing both electrical and mechanical stability.
- Intermittent Connections: If the device functions erratically or fails to work consistently, it may be due to poor solder joints. Cold solder joints can lead to intermittent electrical connections, causing devices to malfunction.
- Excessive Solder: While it might seem that more solder would create a stronger joint, excessive solder can actually lead to problems. It can cause short circuits and may indicate that the solder was applied without proper technique.
Identifying these signs early can save time and resources in the long run. If you notice any of these issues, it’s crucial to rework the solder joint to ensure a reliable connection. Proper soldering techniques, including adequate heating and careful application of solder, are vital to achieving strong, durable connections, especially in critical applications like battery terminals.
In summary, recognizing the signs of poor soldering is essential for maintaining the integrity of electronic connections. By being vigilant and addressing issues promptly, you can enhance the performance and longevity of your electronic devices.
Solutions for Low Wattage Issues
When soldering battery terminals, encountering problems due to low wattage can be frustrating and may compromise the quality of your work. This section will explore effective solutions to address low wattage issues, ensuring that you achieve reliable solder connections.
- Upgrade Your Soldering Iron: One of the most straightforward solutions to low wattage problems is to upgrade to a soldering iron with a higher wattage rating. A soldering iron rated between 30 to 60 watts is generally recommended for battery terminals. This range provides enough heat to melt solder quickly, ensuring a strong bond.
- Preheating Components: Before you start soldering, consider preheating the components you plan to work on. This technique involves warming up the battery terminals and wires slightly before applying solder. Preheating can reduce the amount of heat required from the soldering iron, allowing for improved solder flow and a more effective solder joint.
- Use of Heat Sinks: If you’re dealing with sensitive components that may be affected by excessive heat, using heat sinks can be beneficial. Heat sinks absorb excess heat and prevent damage to surrounding components while allowing you to apply higher temperatures to the solder joint itself.
- Proper Tip Maintenance: Ensure that the tip of your soldering iron is clean and well-tinned. A dirty or oxidized tip can significantly reduce the heat transfer efficiency, making it harder to melt solder. Regularly cleaning the tip and applying a thin layer of solder can improve its performance.
- Adjusting Soldering Technique: Sometimes, the issue may not solely lie with the wattage of the iron but also with how solder is applied. Make sure to heat both the terminal and the wire simultaneously. This ensures that the solder flows into the joint properly, creating a strong connection.
- Consider Using a Soldering Station: For those who frequently work on soldering tasks, investing in a temperature-controlled soldering station could be worthwhile. These stations allow for precise temperature management, ensuring that you always have the right amount of heat for your soldering tasks.
Conclusion
By implementing these solutions, you can effectively overcome the challenges posed by low wattage soldering irons. Upgrading your tools, maintaining proper techniques, and preheating components can significantly enhance your soldering experience and improve the quality of your connections. Remember, a reliable solder joint is crucial for the performance and longevity of battery terminals, so taking the time to address low wattage issues can lead to better outcomes in your projects.
Benefits of Higher Wattage
When it comes to soldering, particularly for applications like battery terminals, the wattage of your soldering iron plays a pivotal role in achieving successful results. Higher wattage soldering irons, typically ranging from 50 to 60 watts, offer several advantages that make them the preferred choice for both professionals and hobbyists alike.
- Faster Heating Times: Higher wattage soldering irons heat up significantly quicker than their lower wattage counterparts. This rapid heating is crucial when working with battery terminals, as it minimizes the time the components are exposed to heat. Prolonged exposure can damage sensitive electronic parts or lead to overheating.
- Consistent Temperature Maintenance: A soldering iron with a higher wattage is better at maintaining a stable temperature. This consistency is vital for creating reliable solder joints. When the temperature fluctuates, it can lead to poor solder flow and weak connections, which can compromise the functionality of the battery.
- Improved Solder Flow: The ability to maintain higher temperatures allows for better solder flow. This characteristic is essential when joining battery terminals, as it ensures that the solder adequately fills the joint. A well-filled joint results in a stronger, more durable connection, which is critical for the performance and longevity of the battery.
- Versatility Across Applications: Higher wattage soldering irons are not only ideal for battery terminals but also versatile enough for various soldering tasks. Whether you are working on larger components or intricate circuit boards, a higher wattage iron can handle a range of jobs, making it a valuable tool for any soldering toolkit.
- Reduced Risk of Cold Joints: Cold solder joints are a common issue when insufficient heat is applied. These joints can lead to intermittent connections and device failures. By using a higher wattage soldering iron, you significantly reduce the risk of cold joints, ensuring that your connections are solid and reliable.
In summary, investing in a higher wattage soldering iron can greatly enhance your soldering experience, particularly when working with battery terminals. The benefits of faster heating, consistent temperature maintenance, improved solder flow, versatility, and reduced risk of cold joints make these tools an essential choice for anyone looking to achieve high-quality soldering results. Whether you are a seasoned professional or a DIY enthusiast, understanding the advantages of higher wattage soldering irons will help you make informed decisions for your projects.

Recommended Wattage for Battery Terminal Soldering
Soldering battery terminals is a critical task that requires the right tools and techniques to ensure reliable connections. One of the most important factors to consider when soldering is the wattage of the soldering iron. The wattage affects how quickly the iron heats up and how effectively it can melt solder, which is essential for creating strong joints. In this section, we will explore the recommended wattage range for soldering battery terminals, the implications of using different wattages, and tips for achieving the best results.
For soldering battery terminals, a soldering iron rated between 30 to 60 watts is generally recommended. This wattage range provides a balance of heat and control, allowing the user to work efficiently without overheating the components. A 30 to 40-watt soldering iron is suitable for small battery terminals and light-duty soldering tasks. It allows for precision soldering, ensuring that the heat is applied just enough to create a good joint without damaging sensitive components.
On the other hand, a soldering iron rated between 50 to 60 watts is ideal for larger battery terminals or more demanding applications. This higher wattage ensures that the iron can quickly heat up and maintain the necessary temperature for effective soldering. Using a higher wattage iron reduces the risk of cold solder joints, which can occur if the iron does not provide enough heat to adequately melt the solder.
When selecting a soldering iron, it is also important to consider the type of solder being used. For example, lead-free solder typically requires higher temperatures to melt compared to traditional leaded solder. Therefore, if you are using lead-free solder, opting for a soldering iron with a higher wattage within the recommended range can enhance your soldering experience.
In addition to wattage, the design of the soldering iron tip can also impact soldering performance. A fine tip allows for more precise application of heat, which is especially useful when working with small battery terminals. Conversely, a chisel or larger tip can distribute heat more evenly over larger surfaces, making it easier to solder larger terminals effectively.
Ultimately, choosing the right wattage for soldering battery terminals is essential for achieving strong, durable connections. By using a soldering iron within the recommended wattage range and employing proper techniques, you can ensure that your solder joints are reliable and long-lasting. Remember to always prioritize safety by using protective gear and working in a well-ventilated area to minimize exposure to harmful fumes.
30 to 40 Watts
A soldering iron rated between is often considered ideal for small battery terminals and light-duty soldering tasks. This wattage range strikes a balance between sufficient heat and the ability to control the temperature effectively, ensuring that you can work with precision without generating excessive heat that could damage sensitive components.
When soldering battery terminals, it’s crucial to apply the right amount of heat. A 30 to 40-watt soldering iron provides enough power to melt solder quickly while minimizing the risk of overheating the battery terminal itself. Overheating can lead to degradation of the terminal or even damage the battery, compromising its performance and lifespan.
In practical applications, a soldering iron in this wattage range is particularly useful for tasks such as:
- Joining wires to battery terminals securely.
- Tinning wire ends to prepare them for soldering.
- Repairing small electronic devices that require precise soldering.
One of the advantages of using a soldering iron within the 30 to 40-watt range is the control it offers. Users can manipulate the iron’s tip to apply heat exactly where it’s needed, which is essential when working on delicate components. This precision is particularly beneficial in electronics where components can be sensitive to heat.
However, it is essential to note that while a 30 to 40-watt soldering iron is suitable for light-duty tasks, it may not be adequate for larger battery terminals or more demanding soldering applications. In such cases, a higher wattage iron may be necessary to ensure a solid and reliable connection. Therefore, understanding the specific requirements of your soldering project is vital for selecting the right tool.
In summary, a 30 to 40-watt soldering iron is an excellent choice for those engaged in light-duty soldering tasks, particularly when working with small battery terminals. Its ability to provide adequate heat while maintaining control makes it a preferred option for hobbyists and professionals alike. Always remember to follow proper soldering techniques and safety precautions to achieve the best results.
50 to 60 Watts
When it comes to soldering battery terminals, selecting the right wattage is crucial for achieving optimal results. A soldering iron rated between is particularly effective for larger battery terminals or more demanding applications. This wattage range provides the necessary heat to ensure quick and efficient soldering, which is essential for creating a solid and reliable connection.
One of the primary benefits of using a soldering iron in this wattage range is its ability to maintain a consistent temperature. This consistency is vital when working with larger terminals, as they require more heat to melt the solder effectively. A 50 to 60-watt soldering iron heats up quickly, allowing you to complete your soldering tasks without unnecessary delays. This is especially important in automotive or electronic applications where time and reliability are critical.
Moreover, a soldering iron within this wattage range minimizes the risk of cold solder joints. Cold solder joints occur when the solder does not melt properly, resulting in weak connections that can lead to failures. By using a soldering iron that provides adequate heat, you can ensure that the solder flows smoothly and adheres properly to both the terminal and the wire. This leads to stronger connections that are less likely to fail over time.
In addition to achieving better solder joints, a 50 to 60-watt soldering iron offers versatility. It can handle various soldering tasks beyond battery terminals, making it a valuable tool for hobbyists and professionals alike. Whether you are working on electronics, circuit boards, or other components, this wattage range provides the flexibility needed for different applications.
It’s also worth noting that when using a higher wattage soldering iron, you still need to employ proper soldering techniques. For instance, it is essential to heat both the terminal and the wire simultaneously. This approach ensures that the solder flows evenly, creating a robust bond. Additionally, keeping the soldering tip clean and well-tinned will enhance heat transfer and efficiency, further improving the quality of your solder joints.
In summary, a soldering iron rated between is an excellent choice for soldering larger battery terminals and demanding applications. It provides the necessary heat for quick soldering, reduces the risk of cold joints, and offers versatility for various tasks. By combining the right wattage with effective soldering techniques, you can achieve strong, reliable connections that will stand the test of time.

Choosing the Right Soldering Iron Type
is crucial for achieving optimal results when soldering battery terminals. With various types of soldering irons available, understanding their unique features and applications can significantly enhance your soldering experience. This section will delve into the different soldering iron types, helping you make an informed decision.
Standard soldering irons are the most commonly used tools for various soldering tasks. They typically have a fixed temperature and are available in different wattages, making them versatile for hobbyists and professionals alike. These irons are ideal for general-purpose soldering, including battery terminals, as they provide a good balance of heat and control.
- Cost-Effective: Standard soldering irons are generally more affordable than specialized models, making them accessible for beginners.
- Ease of Use: Their simplicity allows users to quickly learn the basics of soldering without the need for complex setups.
- Variety of Tips: They come with interchangeable tips, allowing for different soldering applications, from fine work to larger joints.
Temperature-controlled soldering stations offer a significant advantage over standard soldering irons by allowing users to set and maintain specific temperatures. This feature is particularly beneficial when working with sensitive electronic components, as it prevents overheating and damage.
- Precision: The ability to control the temperature ensures that the solder melts at the right heat, providing a more reliable joint.
- Consistent Performance: These stations maintain a stable temperature, which is essential for prolonged soldering tasks, such as working on battery terminals.
- Advanced Features: Many models come with digital displays and programmable settings, making them suitable for both novice and experienced users.
Butane soldering irons are portable and powered by a refillable butane gas canister. They are perfect for outdoor or fieldwork where electricity is not readily available. While they may not be as commonly used as electric soldering irons, they have their unique advantages.
- Portability: Their cordless design allows for easy transport, making them ideal for on-the-go soldering tasks.
- Quick Heating: Butane irons heat up quickly, providing immediate soldering capabilities, which is beneficial when time is of the essence.
- Versatility: They can be used for various applications, including soldering, heat shrinking, and even light-duty welding.
While not a soldering iron per se, desoldering tools are essential for anyone working with soldered connections. They allow you to remove solder without damaging the components, making them a valuable addition to your toolkit.
- Solder Suckers: These are simple devices that create a vacuum to suck up molten solder, making them effective for quick desoldering tasks.
- Desoldering Braid: This copper braid absorbs solder through capillary action, providing a clean and efficient way to remove unwanted solder.
When selecting a soldering iron, consider the specific tasks you will be performing. For general soldering on battery terminals, a standard soldering iron or a temperature-controlled station may be ideal. If you need portability, a butane soldering iron could be the best choice. Understanding these options will not only enhance your soldering skills but also ensure that you achieve reliable and durable connections.
Standard Soldering Irons
Standard soldering irons are among the most commonly used tools in electronics, renowned for their versatility and effectiveness in various soldering applications. These tools are particularly valuable for tasks such as soldering battery terminals, circuit boards, and other electronic components. The balance of cost and performance that standard soldering irons provide makes them an excellent choice for both hobbyists and professionals alike.- Versatility: Standard soldering irons can handle a wide range of soldering tasks, from delicate electronic components to heavier connections, making them ideal for different projects.
- Cost-Effectiveness: Compared to specialized soldering tools, standard soldering irons are generally more affordable, allowing users to invest in quality without breaking the bank.
- Ease of Use: Their straightforward design makes standard soldering irons user-friendly, which is especially beneficial for beginners learning the basics of soldering.
When it comes to soldering battery terminals, the heat output of a standard soldering iron is crucial. A typical wattage range for effective soldering is between 30 to 60 watts. This range allows for sufficient heat to melt solder quickly, ensuring a solid connection without damaging the battery or surrounding components. For smaller terminals, a lower wattage (30-40 watts) is often sufficient, while larger terminals may require higher wattage (50-60 watts) for optimal performance.
Another significant advantage of standard soldering irons is their availability in various tip sizes and shapes. A finer tip is ideal for precision work on small components, while a broader tip can handle larger connections more effectively. This adaptability makes standard soldering irons suitable for a wide array of applications in electronics, from intricate circuit repairs to robust battery terminal connections.
In addition to their functional benefits, standard soldering irons are often designed with user comfort in mind. Many models feature ergonomic handles that reduce fatigue during extended use, making them an excellent choice for projects that require prolonged soldering sessions. Moreover, they typically heat up quickly, allowing users to start their work without long wait times.
However, it is essential to remember that while standard soldering irons are versatile, they may not always be the best choice for every situation. For example, when working with sensitive electronic components, a temperature-controlled soldering station may be more appropriate. Such stations offer precise temperature management, reducing the risk of overheating and damage to delicate parts.
In summary, standard soldering irons represent a reliable and cost-effective solution for a variety of soldering tasks, including battery terminal connections. Their versatility, ease of use, and range of available tips make them indispensable tools in any electronics toolkit. Whether you are a hobbyist or a professional, investing in a quality standard soldering iron can significantly enhance the quality and efficiency of your soldering projects.
Temperature-Controlled Soldering Stations
Temperature-controlled soldering stations are essential tools for both professional and hobbyist soldering tasks. These stations provide precise heat management, which is crucial when working with sensitive electronic components, such as those found in battery terminals. The ability to maintain a consistent temperature not only enhances the quality of the solder joints but also minimizes the risk of damage to delicate parts.
- What is a Temperature-Controlled Soldering Station? – A temperature-controlled soldering station consists of a soldering iron connected to a control unit that allows the user to set and maintain a specific temperature. This feature is vital for achieving optimal soldering conditions.
- Why is Temperature Control Important? – Different components require different temperatures for effective soldering. Overheating can lead to component damage, while insufficient heat can result in weak solder joints. Temperature-controlled stations eliminate these issues by allowing precise adjustments.
- Benefits of Using Temperature-Controlled Stations – These stations offer several advantages, including:
- Enhanced Precision: The ability to set exact temperatures allows for better control over the soldering process.
- Reduced Risk of Damage: Sensitive components are less likely to be damaged due to overheating.
- Improved Solder Flow: Consistent heat promotes better solder flow, leading to stronger joints.
- Versatility: Ideal for various soldering tasks, from delicate electronics to heavier connections.
Key Features to Look For
When selecting a temperature-controlled soldering station, consider the following features:
- Adjustable Temperature Range: Ensure the station can reach the temperatures required for your specific soldering tasks.
- Fast Heating Elements: Look for stations that heat up quickly to save time during projects.
- Ergonomic Design: A comfortable soldering iron can reduce fatigue during extended use.
- Digital Display: A clear display allows for easy monitoring and adjustments of the temperature settings.
Conclusion
In summary, temperature-controlled soldering stations are invaluable tools for achieving high-quality solder joints, especially when working with sensitive components like battery terminals. By providing precise heat management, these stations ensure optimal soldering conditions, resulting in reliable and durable connections. Whether you are a professional technician or a hobbyist, investing in a temperature-controlled soldering station can significantly enhance your soldering experience and outcomes.

Essential Soldering Techniques
When it comes to soldering, particularly for battery terminals, employing the right techniques is critical for achieving strong and reliable solder joints. Mastering these techniques not only enhances the quality of your work but also ensures the longevity and performance of the connections you create. Below, we delve into the key methods that are essential for successful soldering.
Before you even pick up the soldering iron, proper preparation is vital. This involves:
- Cleaning the surfaces: Use isopropyl alcohol or a suitable cleaner to remove any dirt, grease, or oxidation from the terminal and wire. Clean surfaces promote better solder adhesion.
- Tinning the wires: Before soldering, apply a small amount of solder to the stripped ends of the wires. This process, known as tinning, helps the solder flow more easily during the actual soldering process.
By ensuring that the components are clean and prepped, you set the stage for a solid connection.
The actual application of solder is where many beginners falter. To achieve a strong joint, follow these steps:
- Heat the joint: Place the soldering iron tip against both the terminal and the wire simultaneously. This allows both components to reach the necessary temperature for soldering.
- Feed the solder: Once the components are heated, introduce the solder to the joint, not the soldering iron. This ensures that the solder flows into the joint rather than just sticking to the iron.
- Remove the heat: After the solder has flowed into the joint and formed a shiny, smooth surface, remove the solder and then the soldering iron. This prevents overheating and allows the joint to cool properly.
These steps are crucial for creating a reliable and durable solder joint that can withstand the test of time.
After soldering, it’s important to allow the joint to cool naturally. Rapid cooling can lead to weak joints. Once cooled, inspect the joint for quality:
- Visual inspection: Look for a shiny, smooth finish. Dull or grainy surfaces indicate poor soldering.
- Mechanical testing: Gently tug on the wire to ensure it is securely attached. If the wire comes loose, reheat and apply more solder.
Even experienced solderers can make mistakes. Here are some common pitfalls to be aware of:
- Insufficient heat: Not allowing enough time for the joint to reach the correct temperature can result in cold solder joints.
- Overheating: Leaving the soldering iron on the joint for too long can damage components and create weak connections.
- Using too much solder: Excess solder can create bridges between terminals, leading to short circuits. Aim for just enough to fill the joint.
By mastering these essential soldering techniques, you can ensure that your battery terminal connections are not only effective but also durable. Practice makes perfect, so don’t hesitate to experiment and refine your skills. With the right preparation, application, and inspection methods, you will achieve strong, reliable solder joints every time.
Preparation of Components
Proper preparation of components is a crucial step in the soldering process, especially when working with battery terminals. This phase involves cleaning and tinning the surfaces to ensure optimal solder adhesion and improve the overall quality of the solder joint. Neglecting this step can lead to poor connections and potential failure of the electrical system.
Before soldering, it’s vital to remove any contaminants from the surfaces of the components. Dust, grease, or oxidation can significantly hinder the solder’s ability to adhere properly. A clean surface allows the solder to flow smoothly and bond effectively, resulting in a stronger connection. To clean the components, you can use isopropyl alcohol and a lint-free cloth or a specialized electronics cleaner.
Tinning is the process of applying a thin layer of solder to the surfaces that will be joined. This step is essential as it promotes better solder flow and enhances the overall quality of the joint. When you tin the surfaces, you create a more uniform area for the solder to adhere to, which helps in achieving a reliable connection. To tin, heat the component with the soldering iron and apply solder until it melts and coats the surface evenly.
- Cleaning Brushes: These are useful for scrubbing away oxidation and debris from metal surfaces.
- Isopropyl Alcohol: A solvent for cleaning components before soldering.
- Soldering Iron: Essential for both cleaning and tinning processes.
- Desoldering Braid: Helpful for removing old solder and preparing surfaces.
Many beginners overlook the importance of proper cleaning and tinning. Here are some common mistakes to avoid:
- Skipping Cleaning: Always clean the surfaces before soldering to ensure a strong bond.
- Overheating Components: Excessive heat can damage sensitive components. Use the appropriate temperature settings on your soldering iron.
- Inconsistent Tinning: Ensure an even coat of solder when tinning to avoid weak joints.
In summary, the preparation of components is a foundational step in the soldering process that should not be overlooked. By thoroughly cleaning and tinning the surfaces, you ensure better solder adhesion and significantly improve the quality of the solder joint. This attention to detail ultimately leads to more reliable electrical connections and enhances the performance of the entire system.
Applying the Solder
is a critical step in achieving durable and reliable connections in electrical projects, particularly when soldering battery terminals. This process not only involves the application of solder but also requires a firm understanding of the techniques that promote effective adhesion and conductivity. Let’s delve into the essential aspects of applying solder correctly.
When soldering, the primary goal is to create a strong bond between the wire and the terminal. To achieve this, it is crucial to heat both components adequately before introducing the solder. This ensures that the solder flows effectively and forms a solid connection. Here’s a step-by-step breakdown:
- Preparation: Begin by cleaning the surfaces of both the terminal and the wire. This can be done using a fine abrasive or sandpaper to remove any oxidation or contaminants.
- Tinning: Before applying solder, it’s beneficial to apply a small amount of solder to the tip of the soldering iron and then to the wire and terminal. This process, known as tinning, helps improve the flow of solder during the actual soldering process.
- Simultaneous Heating: Position the soldering iron so that it contacts both the wire and the terminal at the same time. This is essential because it allows the solder to melt and flow into the joint, creating a strong bond.
Heating both the terminal and the wire simultaneously is vital for several reasons:
- Optimal Solder Flow: When both components reach the appropriate temperature, the solder can flow freely, filling any gaps and ensuring a complete connection.
- Minimized Cold Joints: Cold solder joints occur when the solder does not melt properly, leading to weak connections. By heating both parts, the risk of creating cold joints is significantly reduced.
- Improved Electrical Conductivity: A well-soldered joint enhances conductivity, which is particularly important in battery terminals where efficient power transfer is essential.
While applying solder may seem straightforward, there are common pitfalls that can lead to poor results:
- Insufficient Heat: Failing to adequately heat both components can result in inadequate solder flow, leading to weak joints.
- Overheating: Conversely, applying too much heat can damage the components or cause the insulation on wires to melt, compromising the integrity of the connection.
- Inadequate Solder Application: Using too little solder can leave gaps in the joint, while using too much can create messy connections and increase the risk of shorts.
To ensure the best results when soldering battery terminals, consider the following best practices:
- Use Quality Solder: Opt for high-quality rosin-core solder, as it provides better flow and adhesion.
- Maintain Your Tools: Regularly clean the soldering iron tip to ensure efficient heat transfer and prevent oxidation.
- Practice Patience: Take your time during the soldering process to avoid rushing, which can lead to mistakes.
In summary, applying solder correctly is a fundamental skill in electronics that can significantly affect the performance of battery terminals. By understanding the importance of simultaneous heating and following best practices, you can achieve strong, reliable connections that ensure optimal functionality in your electrical projects.

Safety Precautions When Soldering
Soldering is a valuable skill used in electronics, crafts, and various DIY projects. However, it comes with inherent risks that can lead to injuries or health issues if proper safety measures are not taken. Understanding these risks and implementing effective safety precautions is essential for anyone involved in soldering tasks.
- Burn Risks: One of the most immediate dangers of soldering is the risk of burns. Soldering irons can reach temperatures exceeding 400 degrees Fahrenheit (204 degrees Celsius), making contact with skin extremely hazardous. To mitigate this risk, always handle the soldering iron by its insulated handle and place it in a designated stand when not in use.
- Fume Exposure: Soldering can produce harmful fumes, especially when using lead-based solder. These fumes can be detrimental to respiratory health. To protect yourself, ensure that your workspace is well-ventilated. If possible, work near an open window or use a fume extraction system to draw away harmful vapors.
- Protective Gear: Wearing appropriate protective gear is crucial. Safety glasses can shield your eyes from solder splashes and flying debris, while heat-resistant gloves can protect your hands from accidental contact with the soldering iron. Additionally, consider wearing a lab coat or apron to protect your clothing and skin.
- Work Surface Safety: Always use a heat-resistant mat or surface when soldering. This practice not only protects your work area but also reduces the risk of igniting flammable materials. Keep your workspace organized to avoid accidents caused by clutter.
- Proper Tool Handling: Familiarize yourself with the tools you are using. Ensure that your soldering iron is in good working condition and that the tip is clean. A dirty or damaged tip can lead to poor solder joints and increase the risk of accidents.
- Emergency Preparedness: Always have a first aid kit accessible in your workspace. In case of burns or other injuries, knowing how to respond quickly can minimize harm. Familiarize yourself with basic first aid procedures, especially for burn treatment.
Conclusion
By understanding the risks associated with soldering and following these essential safety precautions, you can create a safer working environment. Always prioritize your health and safety while enjoying the rewarding process of soldering. Whether you are a beginner or an experienced solderer, maintaining awareness and applying these practices will help you avoid accidents and ensure a successful soldering experience.
Protective Gear
When engaging in soldering tasks, particularly when working with battery terminals, the importance of wearing appropriate protective gear cannot be overstated. Soldering involves high temperatures and potentially hazardous materials, making it essential to prioritize safety to prevent injuries and ensure a secure working environment.
- Safety Glasses: Protecting your eyes is crucial when soldering. Soldering can produce splashes of molten metal and harmful fumes. Wearing safety glasses can shield your eyes from these hazards, reducing the risk of burns or irritation.
- Heat-Resistant Gloves: These gloves are designed to withstand high temperatures, providing a barrier against burns while handling hot components. They allow for safe manipulation of soldering irons and other heated tools without risking skin contact with hot surfaces.
- Long-Sleeved Clothing: Wearing long sleeves can further protect your skin from accidental burns and exposure to solder splashes. Opt for materials that are less likely to catch fire, such as cotton or specialized heat-resistant fabrics.
- Respirators or Masks: To mitigate inhalation of harmful fumes produced during soldering, wearing a respirator or a mask designed for fume protection is advisable. This is particularly important when soldering in confined spaces or without adequate ventilation.
- Aprons: A heat-resistant apron can provide an additional layer of protection against hot solder and tools, helping to keep your clothing and skin safe during the soldering process.
Why is Protective Gear Essential?
The soldering process involves the melting of solder, which can reach temperatures above 400°F (204°C). Such high temperatures pose a significant risk of burns. Protective gear serves as a first line of defense against these risks.
Additionally, solder often contains lead and other toxic materials. Exposure to these substances can lead to serious health issues over time. Proper protective equipment minimizes this exposure, ensuring a safer working environment.
Creating a Safe Workspace
In addition to wearing protective gear, it’s crucial to maintain a tidy and organized workspace. Ensure that your soldering area is well-ventilated to disperse harmful fumes. Use fume extraction systems if available, and keep flammable materials away from your work area.
In summary, investing in quality protective gear is a vital step in ensuring safety while soldering battery terminals. The potential risks associated with soldering can be significantly mitigated by following these safety practices, allowing for a more efficient and secure working environment.
Ventilation and Fume Extraction
When engaging in the soldering process, proper ventilation and the use of fume extraction systems are critical for maintaining a safe and healthy workspace. Soldering can release harmful fumes that pose risks to both health and safety. Understanding how to effectively manage these fumes is essential for anyone involved in soldering activities.
Firstly, it is important to recognize the types of fumes generated during soldering. These fumes can include rosin vapors, which are produced when using rosin-based solder, as well as other toxic substances that may come from the solder itself or the materials being soldered. Prolonged exposure to these fumes can lead to respiratory issues and other health problems.
To mitigate these risks, implementing a proper ventilation system is crucial. A well-ventilated workspace allows for the continuous exchange of air, reducing the concentration of harmful fumes. Here are some effective strategies for ensuring adequate ventilation:
- Natural Ventilation: Open windows and doors to create cross-ventilation. This method is simple but may not always be sufficient, especially in enclosed spaces.
- Mechanical Ventilation: Use exhaust fans or ventilation systems designed to draw out contaminated air. Positioning these systems near the soldering area can significantly reduce fume exposure.
- Air Purifiers: High-efficiency particulate air (HEPA) filters can capture fine particles and fumes, improving overall air quality in the workspace.
In addition to ventilation, using fume extraction systems is highly recommended. These systems are specifically designed to capture and filter harmful fumes at the source, providing a more effective solution than general ventilation. Fume extraction systems typically consist of:
- Extraction Arms: Flexible arms that can be positioned close to the soldering area to capture fumes directly as they are generated.
- Filtration Units: These units filter out harmful particles and gases, ensuring that clean air is recirculated back into the workspace.
- Portable Units: For those who may not have a permanent soldering setup, portable fume extractors can be easily moved and used as needed.
It is also important to regularly maintain ventilation and fume extraction systems to ensure they operate effectively. Regular checks and cleaning of filters can prevent blockages and ensure optimal airflow, enhancing the overall safety of the workspace.
In conclusion, ensuring proper ventilation and utilizing fume extraction systems are essential practices when soldering. By taking these precautions, individuals can significantly reduce their exposure to harmful fumes, promoting a healthier and safer working environment. Prioritizing these safety measures not only protects health but also enhances overall soldering performance.

Conclusion and Final Thoughts
In the realm of soldering, particularly when it comes to battery terminals, the importance of selecting the right wattage cannot be overstated. The wattage of your soldering iron directly influences its ability to generate the necessary heat to melt solder effectively, which is crucial for creating strong and reliable connections. This article delves into the significance of wattage, the techniques needed for successful soldering, and the precautions to take to ensure safety and effectiveness.
Wattage is a fundamental aspect of soldering that dictates how much heat a soldering iron can produce. A higher wattage allows the iron to heat up quickly and maintain a consistent temperature, which is vital for soldering battery terminals that require a solid, lasting connection. Insufficient wattage can lead to inadequate heat, resulting in cold solder joints that can fail over time, compromising the performance of the battery.
To achieve optimal results when soldering battery terminals, employing the right techniques is essential. Here are some critical methods:
- Preparation of Components: Clean the surfaces of the battery terminals and wires thoroughly. This ensures better solder adhesion and improves the quality of the joint.
- Tinning: Before soldering, apply a small amount of solder to the tip of the soldering iron and the components. This process, known as tinning, helps to create a better bond.
- Simultaneous Heating: When applying solder, heat both the terminal and the wire at the same time. This allows the solder to flow smoothly, creating a strong bond.
Safety should always be a priority when soldering. Here are some essential precautions:
- Protective Gear: Always wear safety glasses and heat-resistant gloves to protect yourself from burns and splashes of molten solder.
- Ventilation: Ensure that your workspace is well-ventilated to avoid inhaling harmful fumes released during the soldering process. Consider using a fume extraction system for added safety.
When selecting a soldering iron, consider the wattage and type. A soldering iron rated between 30 to 60 watts is generally recommended for battery terminals. For smaller terminals, a 30 to 40-watt iron is suitable, while a 50 to 60-watt iron is better for larger terminals or more demanding applications. Additionally, temperature-controlled soldering stations offer precise heat management, ensuring optimal conditions for soldering.
In conclusion, the process of soldering battery terminals requires careful consideration of wattage, techniques, and safety measures. By selecting the right tools and employing effective soldering methods, anyone can achieve strong and reliable connections. Remember that practice makes perfect; with time and experience, your soldering skills will improve, leading to more successful projects.
Frequently Asked Questions
- What wattage is ideal for soldering battery terminals?
For soldering battery terminals, a soldering iron rated between 30 to 60 watts is generally recommended. This range provides the right balance of heat and control for effective soldering.
- What are the signs of poor soldering?
Signs of poor soldering include dull finishes or cracks in the solder joint. These indicate that the joint has not been adequately heated, resulting in weak connections.
- Can I use a lower wattage soldering iron?
While you can use a lower wattage soldering iron, it may lead to cold solder joints that can fail over time. It’s best to stick to the recommended wattage for reliable results.
- How can I improve solder flow with low wattage?
If you’re facing issues with low wattage, consider preheating the components or upgrading to a higher wattage iron to enhance solder flow and connection quality.
- What safety precautions should I take when soldering?
Always wear protective gear like safety glasses and heat-resistant gloves. Also, ensure proper ventilation or use fume extraction systems to safeguard against harmful fumes.